

Rss Bot
-
Content Count
19,477 -
Joined
-
Last visited
Never -
Feedback
N/A
Posts posted by Rss Bot
-
-
Researchers say a new remote access Trojan dubbed UBoatRAT is targeting individuals or organizations linked to South Korea or video games industry.
-
Creating your own video game characters means you can push yourself and go crazy with the design idea, as long as the concept still works as a video game character. This means it has to be readable in its environment, the design has to support the game function of the character, and the technical artists have to be able to rebuild the design within the game’s technical restrictions.
In this tutorial I’ll first show you how to go completely nuts and push your ideas and concepts to the extreme. Then I’ll show how I take the design and clean it up for professional use. A key aspect is creating a beauty shot, which clearly shows the attitude and movement of the character.
My painting process combines traditional and digital media, but my steps don’t require mastery in any of these mediums. They require an open mind, patience with yourself, and pushing through until you have that great idea.
Because creating a piece of concept art involves working within limits, here’s the character brief I’ll work to: create a non-playable character (NPC) for a 3D roleplaying video game, with a merchant game function and a wicked attitude. And just for fun, the shape will be page-filling and the colours will be flashy. So get your best pencils ready and follow me.
01. Explore sources of inspiration
Images might be ugly, but you've got to start somewhere
The brief is to create a Merchant NPC with a street-wise attitude, who’ll appear in a 3D RPG. My goal is to create a strong design with artistic value, so I explore photo books, music, art and literature for imagery that provokes an emotion. I take in as much as possible and make notes on whatever catches my eye. Scribbles at this stage are often ugly, so don’t worry about that.
02. Clearly define the character's game role
Character routes are mapped out
Now to the character’s game function. Given the brief I write down whatever I associate with the terms “merchant” and “NPC”. Then I separate my list into two: things that are necessary for the character’s readability; and those that aren’t. Exploring unconscious design decisions and then discarding them gives me room to freely explore outside the box.
03. Go wild!

Finally a character idea strikes!
With this conceptual foundation in place, I start drawing whatever comes to mind. I want to find my own, unique source of inspiration. It’s at this stage that I get an idea for my character for the first time. I decide on complex patterns and simple, clean-cut clothing to balance them. I want an eerie-looking face and lots of items attached to the body.
04. Be prepared to push an idea
Different iterations are thrashed out
Whenever I hit an interesting idea I stop and redraw it three times, each time pushing it further, changing the main volumes and the level of detail. I also have to think about whether or not to add a main element, and decide that it’ll be a house. To keep my drawing bold, I only use fineliner pens here.
05. Pick the strong designs

Use a fresh eye to assess the designs
After taking a break I return to look at the sketches and immediately mark those designs that catch my eye first. Then I mark convincing attitudes and then strong shapes. I add notes to remind me later what I saw in each. I look out for opportunities to create clean volumes and contrast, because they add interest.
06. Create initial concepts in Photoshop
Strong ideas are simplified
In Photoshop I take my good ideas and combine them into strong, single designs, keeping them loose but readable. I ensure each design has a clear focus. I select a shape using the Lasso and Magic Wand, then add colours or values. If you have a clear vision for the colours, go for it. Otherwise, work in greyscale for now.
07. Translate for your medium
Shapes are given volume
My final medium is 3D, so I have to break the design down into simple volumes and translate details into textures. I ensure that posture and gesture can be animated easily while everything else can be summed up with minimal effort. In a team I would work closely with the animator and modeller during this stage.
08. Make beauty shot thumbnails
Beauty shots communicate a certain atmoshpere
I do a lot of beauty shot thumbnails until I get a feeling for the character. A good beauty shot shows both the attitude and the atmosphere of the game. Showing the main volumes is more important than showing design details. These are the criteria for choosing the right sketch to take forward; I choose III.
09. Sketch loose background shapes
A simple sketch gets a feel of the character
After drawing a clean sketch based on the thumbnail, I use the Pen tool to create the different shapes on separate layers. I keep things simple here because I can add details later using a mask. I then quickly airbrush some shadows indicating my main light source, to get a feeling for the overall look. After that I start rendering and adding details.
10. Sprint to the finish
Details are quickly added
To make sure I don’t overwork it, I try to finish every element as quickly as possible. For this, selecting areas with the Lasso is key. I change the feathering from 0 to 8 pixels and add texture, smaller volumes and effects this way. I use a textured brush to fill my selection until I achieve the desired effect. I continue defining volumes and textures until it’s finished.
This article was originally published in issue 141 of ImagineFX, the world's best-selling magazine for digital artists – packed with workshops and interviews with fantasy and sci-fi artists, plus must-have kit reviews. Subscribe to ImagineFX magazine now.
Related articles:
-
Branding and creative agency DixonBaxi’s diverse staff are creatively restless – that is, they're passionate about continually evolving and improving, and have the curiosity and drive to make new ideas a reality.
- Christmas offer: Save up to 47% on a subscription to Computer Arts
Co-founders Simon Dixon and Aporva Baxi met 24 years ago, when the former interviewed the latter for a new London-based studio, staffed by a small team of northern designers aspiring to “make their name in the big city”. The two just clicked and the rest, as they say, is history.
Dixon says: “We’ve always believed that the bit between the two of us is more powerful than the individuals. That’s where the magic is.”
We caught up with the creatives to explore how this magic middle ground translates into a 30-strong agency model. In the video and written interview below, the co-founders tell us about DixonBaxi as an agency, and further down we catch up with junior designer Thierry Nahayo and design director Harry Ead about how to thrive in a creatively restless studio.
How would you define your studio culture?
Simon Dixon: We’re very focused and intense. Hopefully in a positive way: it’s about creating great work. Over the years, we’ve tried to create a space to have fun too. Every Friday, we have a ‘family lunch’ together. We go out together.
Obviously, the team goes out much more with each other than we do necessarily, but we try to enjoy the process without losing the focus that we’re trying to achieve something creatively excellent, and that does require putting in the hours.
There are certain things we care about. Challenging the status quo; being restless; caring about what you do; understanding your audience. Little details like kerning and leading are just as important as big ideas. It goes from the macro to the micro.
I think people chant about man hours, and work-life balance. I get out of bed in the morning because I love it. I’m defined by my creativity. If you don’t want to work hard on the creative industries, you should be in a different industry, I think.

DixonBaxi created a bold, modern and confident brand voice for the History channel
Aporva Baxi: We have people from all over the world here, and that adds a real energy. You get different points of view, but they are all full of integrity and have a genuine quality. We see everything in a collective way.
We print a ton of work out. Standing around it or putting it on the wall creates an openness, and that discussion literally can involve tearing work up, or reorganising it. That hands-on ability helps people understand what they’re making.
You’ll always see people up and talking, really expressing themselves, and it makes for a more thrilling and immersive way of creating work. It isn’t a quiet, headphones on and no music sort of environment. There is a real spirit, and that finds interesting personalities.
What is creative restlessness?

The DixonBaxi team isn't quiet
What does it mean to be creatively restless?
SD: It’s an operating system. If you’ve worked for 25 years in an industry and you want to be valid, you’d better be restless. Otherwise you’ll plateau, and then you’re gonna drop.
It’s about creative self-fulfilment. It’s about learning and engaging with the world and doing new things. Pushing the envelope of our industry, because why be in it otherwise?
AB: It’s not simply about flitting from one thing to another. It’s really learning, and creating what’s next. It’s trying to find the next thing.
Your tagline is ‘changing things for the better through creativity’. How much of that is about design for good, versus commercial metrics?
SD: We see creativity as a tool to improve things, and that could be a very small change, or a massive, cultural internal change within a business. It could also be social change. It depends on the client we’re working with.
We are basically commercial artists. Very large brands want to engage people, and our job is to help them do that – but you have to do that on the merits of how that brand fits into someone’s lifestyle, and has relevance and validity and purpose.
Take the Premier League, for example: you have to enjoy the football watching experience more if we’ve worked on it than if we haven’t. Why would we design a complex motion and design theory if it didn’t enhance the experience of watching the thing you love?

DixonBaxi worked with DesignStudio’s Premier League identity to create a broadcast graphics language
AB: We root that inside the company as well – the idea that we can change things for the better. Again, it’s about being restless, about improving things – it’s that thought that any aspect of anything we do can be changed for the better.
That also allows for a freedom and an openness when we’re talking about work. We move projects through the studio, or take work from one team and give it to another for a different point of view. We also tend to work really quickly, which means we’re looking at work on a daily basis. We all meet at around 4 o’clock, when there’s still enough time to get somewhere.
How to thrive in a creatively restless studio
DixonBaxi design director Harry Ead and junior designer Thierry Nahayo share their dos and don’ts for making work that stands out. Watch them speaking in the video below and read their top four tips below that.
01. Do get bad ideas out the way early
“We get as many people involved as we can from the start, from different skillsets,” explains Ead. “We have a creative sprint, where we spend a week or two doing everything you can imagine. Stuff that’s wrong, stuff that’s right.” The most important thing, he adds, is not to worry about nailing it first time.
Thierry Nahayo agrees: “Make all the wrong decisions first, and smash those out the way,” he grins.
02. Don’t be afraid to rip stuff up
“I enjoy making mess. You can always tidy it up afterwards,” says Ead. “We print lots of stuff out, get everyone around, and it’s a communal effort to get the idea. It’s hard to get that kind of viewpoint when things are on a screen. It breeds a little bit of healthy competition as well,” he goes on. “Once it’s out on the floor, you have nowhere to hide.”
Of course, making mess has downsides: “We have to constantly tidy these areas, because literally there’s paperwork every single day,” admits Nahayo. “It keeps us on our toes to see what everyone is doing, and also it gets us back in line.”

Home of the Olympics is a major branding campaign for Eurosport, to present the channel as the exclusive European partner for the global sporting extravaganza
03. Do put the hours in when necessary
"There’s always going to be a bit of a pinch point,” insists Ead. “You’ve got to put in the hours to make it good, but I think that comes with being passionate about what you do. If you love being a designer and you care about the project, you’re going to put the time and the hours in because you want it to be the best it can. Opportunities like working on the Olympics don’t come around very often, so it’s worth the odd late night.”
04. Don’t rest on your laurels
“Restlessness is part of our everyday life here,” says Ead. “The constant push to try to make things as good as they can be bleeds into every single bit of work we do.”
Part of that is not resting on your laurels, adds Nahayo: “I don’t think that after we do an incredible project here, we stick with just thinking about it,” he says. “Before you know it, we’ve forgotten it and we’re onto something massive.”
This article was originally published in issue 271 of Computer Arts, the global design magazine – helping you solve daily design challenges with insights, advice and inspiration. Buy issue 271 here or subscribe to Computer Arts here.
Special Christmas offer: Save up to 47% on a subscription to Computer Arts for you or a friend for Christmas. It's a limited offer, so move quickly...
Related articles:
-
UXmas is back for a fifth year running to bring festive cheer to the hearts of UX practitioners all around the world – starting, of course, tomorrow. Boasting some of the biggest names in the UX community, this digital advent calendar is a fun and informative way to count down to Christmas.
Set up in 2012, UXmas is a joint effort from the teams at online learning resource UX Mastery and Melbourne-based user experience design team Thirst Studios. Though it may not have nude artwork like Mr Bingo's scratch-off advent calendar, users can look forward to receiving a UX-related treat every single day as a new window is made available to open.
These treats include anything from an article or a video, to a sketch or something else all together. The team behind UXmas was keen to make sure there were some surprises in store, just like a real calendar.
“For the past month or two, the elves at UX Mastery and Thirst Studios have been working closely with the authors to package up another very special digital advent calendar for user experience designers," says UX Mastery co-founder Luke Chambers.

The lead up to Christmas starts now with UXmas
And this year's version of UXmas includes some slightly different content.
“We're experimenting with shorter content and different content formats, to highlight value, make things more concise and a lot more fun. It was also a bit kinder on the authors who do a stellar job putting this stuff together uniquely for the calendar,” says Chambers.
In the past, UXmas has featured prominent voices including Andy Budd, Indi Young, Susan Weinschenk, Eric Meyer, Elizabeth Churchill, Steve Portigal, Whitney Hess and many others.
It’s our little gift to the UX community at Christmas time
Ben Tollady - Thirst Studio“But we attribute UXmas' success to the breadth and quality of content from the curious and creative minds of all our authors – the emerging voices, UX engine rooms and friendly faces that make the user experience scene what it is,” Chambers adds.
“Seriously though, it’s really just a bit of fun and a nice way to give a little something back to the burgeoning UX community that has been so supportive to us," says Thirst Studios' experience design director Ben Tollady. "We’ve had a lot of positive feedback over the years so it certainly seems to be of value, and that makes us happy. It’s our little gift to the community at Christmas time.”
Related articles:
-
Gouache is more forgiving than watercolour paint, but decisions you make early on can still affect the rest of the painting, so planning your colour choices in advance will ensure you get a pleasing palette with harmonious colours.
Although it may be tempting to dive in to start painting right away, this usually results in a lot of mistakes and tedious backtracking. If you lay down a vibrant violet sky in your initial wash, for example, the chances are that’s what you’ll end up with. Depending on the amount of moisture in your brush, gouache can also lift and mix with each layer applied on top, so there’s a limited number of times you can rework an area before it becomes a muddy mess.
This is why it helps to plan out your colour choices in advance, so all the heavy lifting is done before you even touch brush to paper. Mixing your palette from a limited pool of colours will result in a more unified colour scheme. Mix secondary colours from primaries or variations thereupon, tinted using titanium white and a subtractive black. Here's how to do it.
01. Gather materials and get started

Assemble paint, watercolour paper, brushes and recycled containers
While it’s worth investing in artist-grade paints and paper, your setup itself doesn’t need to be complicated or expensive. The paints I used are M. Graham gouache and Winsor & Newton gouache, which are high-quality, colourfast brands. To avoid paint drying, store the tubes away from light and heat.
Organise your palette according to warm and cool values – the colours I used here are Ivory black, Prussian blue, Primary blue, Magenta, Cadmium red, Cadmium yellow and Yellow light, and Titanium white.
Mix the colours with the consistency of mud in mind, as you can always water them down later. Keep the colours you'll need a lot of in separate airtight containers (like these old yoghurt pots) and use them as needed. An old garbage brush is fine for mixing the colours; a palette knife wouldn’t be able to lift paint off the surface.

Checking a colour comp of the planned image with a black and white adjustment makes sure the values are correct
Creating a printed colour composite can really help you to match paint mixes. Plan it out in Photoshop, where working in LAB colour space makes it easier to create a more harmonious colour scheme. You can also then use the Black and White adjustment layer to check that your values work.
02. Plan your painting

Advanced planning can save a lot of time later
Analyse the composite image you created in Photoshop to determine the colours required to paint it, and how much of each to mix. Although this looks like a colourful image, you can achieve this look with three base mixtures.
The base colour of mountain will need a reddish brown hue that you can lay down as an initial wash and use throughout the painting. Use variations on this base colour when painting in the facets of the mountain, tinting them either warmer or cooler using the sky colour.
A black mixture can be used for darkening areas throughout the image, while tinting with titanium white will lighten areas.
The top of some trees require a bright green mixture. Cadmium Yellow light is ideal for painting bright foliage.
The sky is a slight gradient, so keep this in mind when mixing a pure blue hue, as well as a darker shade to mix in later on. A warm grey mix will be needed for the underside of the clouds, too.
03. Mix the base hues

The black, reddish brown and blue base colours need mixing first
Mix the base hues first, as you’ll mix these with each other and with the other colours on your palette to achieve harmonious colours in this painting.
The black mix is a mixture of Prussian blue, Magenta, Cadmium red and Cadmium yellow. To make this as neutral as possible, test it by mixing it with Titanium white. If the result is a neutral grey (sitting between the warm and cool spectrums), then you've found my mix.
The sky blue mixture is just a straightforward mix of Primary blue. You can tint this pure mix using Magenta and Prussian blue to use as a gradient for the sky.
The base hue of the mountain is composed of Cadmium red, Magenta, Yellow and Primary blue, but keeps things on the warmer/magenta side.
04. Break it down further

Expand the base colours for a full palette
Once you've mixed everything, you'll have a full palette of base colours, bright green for the trees and darker and lighter variants that correspond with the comp.
Keep the pure colour mixes towards the top of the palette and mix from them. Use the black mixture to shade, cool things down with the sky blue mixture, or tint with white as needed.
05. Fit it all together

The colour palette that was used in the painting
Make sure that you know how your mixed colours relate to all of the areas of your comp image before you start painting.
The swatch card above shows the colours contained in the palette for this image. It’s not perfect, and it will change a little during the painting process, but already you're miles ahead of where you'd be if you went in blind.
(A) is the base tint of the mountain at about 15 per cent opacity.
(B-F) are all at about 30 per cent.
(G) is a subtractive black mixture.
(J) is a neutral grey cloud colour mixed using (I), (L) and (B).
(L) is a bright green mixed from pure Cadmium yellow and (H).
(K) and (M) are both cooler satellite mixtures of (L).
Once you're happy with your mixed gouache colour palette, start painting.
This article was originally published in issue 152 of ImagineFX, the world's best-selling magazine for digital artists – packed with workshops and interviews with fantasy and sci-fi artists, plus must-have kit reviews. Buy issue 152 here or subscribe to ImagineFX here.
Related articles:
-
Stock art is an essential tool for any creator. Having the right image to fit a project is important, and you can always find the exact image you need with Stock-Graphics' massive library. For a limited time, you can get a lifetime subscription for just $19 (approx. £14) thanks to a special price drop.
No matter what your project calls for, Stock-Graphics has exactly what you need. You'll find tons of assets, from one-of-a-kind vectors to a massive collection of editable images that can be used as you see fit.
There are more than 13,500 photos and 2,900 vectors with new content being added every month, meaning you'll never run out of the inspiration that you need. Download as many images as you like and put them to use in all of your projects without restrictions.
A lifetime subscription to Stock-Graphics usually runs to $4,999, but you can get full access on sale now for a special, low price of just $19 (approx. £14). That's a massive 99% saving off the retail price for an essential asset for any designer, so grab this deal while you can.
About Creative Bloq deals
This great deal comes courtesy of the Creative Bloq Deals store – a creative marketplace that's dedicated to ensuring you save money on the items that improve your design life.
We all like a special offer or two, particularly with creative tools and design assets often being eye-wateringly expensive. That's why the Creative Bloq Deals store is committed to bringing you useful deals, freebies and giveaways on design assets (logos, templates, icons, fonts, vectors and more), tutorials, e-learning, inspirational items, hardware and more.
Every day of the working week we feature a new offer, freebie or contest – if you miss one, you can easily find past deals posts on the Deals Staff author page or Offer tag page. Plus, you can get in touch with any feedback at: deals@creativebloq.com
Check out these great articles:
-
Whether it is a signup flow or a multi-view stepper, forms are one of the most important components of digital product design – so you need to design them so they work effectively on mobile devices.
Here's how to design forms for mobile devices, including a quick look at how to use Flexbox.
01. Design for vertical scroll
A single column layout works better
Regardless of the device size, the easiest way to complete a form is in a linear fashion. Multiple columns disrupt a user's momentum (the users are likely to interpret the fields inconsistently, which is a negative factor in terms of usability) and can result in users having to resort to horizontal scrolling.
When it comes to laying out forms, you should design the entries in one column: if a form is in a single column, the path to completion is a straight line down the page.
02. Place labels above fields
Place labels above form fields
Labels tell users what the corresponding input fields mean. When choosing where to place your labels you have two options: left-aligned or top-aligned.
Left-aligned labels work well if the form is being completed on a desktop or tablet. However, they are an awful solution for mobile devices where there is limited screen estate. Since left-aligned labels need to sit before the field, the narrow screen leaves very little space for the field itself – especially if the device is in portrait mode. This creates two serious usability issues:
- The form field won't be wide enough to display the user's entire input, making them more likely to mistype their responses and leading to more erroneous forms being submitted
- When a user is notified that they have entered erroneous information, they may have a hard time spotting and fixing the problem as they won't be able to see the entire invalid input
Placing the label above the form field when a user is browsing from a mobile device will ensure users can see the maximum width to input their details, since you don't need to use up any for the label.
Writing your labels above the input fields also makes it much easier for you to write clear and meaningful field labels, as you won't be limited to one or two words.
03. Use tap targets
Tap targets should be easy to use no matter what size of device they are displayed on. Larger targets (input fields and buttons) are easier for users with lower dexterity, whether that is a permanent condition or a temporary one caused by the environment.
At the moment, the largest target size is for touch devices, so you need to design touch-first. This ensures users won't have to zoom in to enter the text or select an option. Clickable areas should follow the fat finger rule and not encroach on surrounding areas: the average human finger pad is 10 x 14mm and the average fingertip is 8-10mm, making 10 x 10mm a good minimum touch target size.
But not only should a tap target be properly sized, you should also ensure there is enough space between multiple tap targets. In fact, if you are getting the 'Tap target size' error on mobile SEO tools, it is often because your tap targets are too close together, rather than the actual tap target being too small.
It can be tough to read content on mobile devices, so making the inputs 100% and ensuring the text is set to at least 16px (1em) will make a big difference. That way, no pinch zooming or extra scroll will be required to read the required information.
04. Use HTML5 form fields
Mobile devices offer custom software keyboards for different input types, and HTML5 form fields are the single easiest way to improve the user experience of your forms. These input types give hints to the browser about what type of keyboard layout to display for on-screen keyboards.
Include the input types of number, email, tel, url and date, and the keyboard input on your mobile devices will update to make it easier for the user to filling in the form. It does not require you to add extra classes to style form inputs, all you need to do is to use valid HTML5 input types:
05. Use Flexbox
Let's face it – it's difficult to create a responsive layout in HTML. Most of us have struggled with this at one point or another. Although it's always been possible to make layouts behave as expected using specialised technologies, the process has never been easy.
Technologies to deal with structured layouts have come and gone over the years: developers have used HTML frames, HTML tables, float-based layouts, and, more recently, various grid systems popularised by CSS frameworks such as Bootstrap.
But with the advent of the HTML Flexible Box model (or Flexbox), HTML has finally gained a rich box formatting engine that addresses complex layouts, including HTML forms.
Flexbox gives us great flexibility for quickly building beautiful forms. The key thing to understand about Flexbox is that it's a container manipulation tool: it aims to provide a more efficient way to lay out, align and distribute space among items in a container, even when their size is unknown and/or dynamic (hence the word 'flex').
What's interesting is that Flexbox gives us great flexibility for quickly building our form without using any media queries. Plus, all current browsers support it.
Our Web designer's guide to Flexbox article tells you more, but for now let's do some practice and learn how to take advantage of Flexbox to create a responsive form. First things first, let's define the HTML structure for our form:
Notice that each of the list items in our form has a class of flex. This class identifies the flex container in our form. One of the big benefits of Flexbox is its ability to use any HTML element to define its containers and elements.
You can apply Flexbox styling to any HTML element, which means you can easily restyle and reflow elements independently of each other. Keep in mind that Flexbox is just a styling mechanism, which means that you can add and remove it at will.
Let's identify the flex containers in our CSS. Additionally, we want to vertically centre the flex items across the cross-axis. It's pretty easy to specify that, we just need to set up a simple CSS rule:
The next step is to specify the widths for the flex items. The main requirements:
- Labels should be at least 100px and at most 200px
- Form elements that come after the labels should be at least 200px
What does this give us? Each label and its associated form element will be displayed on a single horizontal row when the width of the form totals at least 300px (remember, we're using right-aligned labels here).
Lastly, for the submit button, which is also a flex item, we define a few basic styles:
As you can see, with minimal markup and the power of Flexbox, we've built a responsive form.
With more users carrying mobile devices, it's crucial to deliver a user-friendly experience on any device. The key point is to adapt to both the user's needs and the device's capabilities.
This article was originally published in issue 287 of net magazine, the magazine for professional web designers and developers – offering the latest new web trends, technologies and techniques. Subscribe to net here.
Related articles:
-
When trying to convey a design idea to win pitches and get an early sign-off, moods, feelings and visions can be difficult to communicate verbally. So designers will often use mood boards: a collection of textures, images and text related to a design theme as a reference point.
Mood boards help others to 'get inside our heads' as they show what you're thinking and feeling about a creative idea and your intended vision for a piece of work.
That said, mood boards can be a pain to create, with many hours spent trawling image galleries, websites, books and magazines looking for that perfect image to sum up your intended feel for the work at hand. The right tools for creating mood boards can help, plus here are a collection of tips to help make your mood board making more effective – and double your chances of winning that pitch.
01. Look beyond the digital world

Made by Many used copies of Picture Post to inspire its redesign of the ITV News site
When putting together mood boards, it's easy (and therefore tempting) to just use Google Images. But just because you're working on a digital product doesn't mean you have to stick to digital inspiration.
For example, while working on the ITV news website, digital product design company Made by Many looked at copies of the veteran Picture Post magazine in order to express how powerful and effective an image plus a caption can be for telling a news story.
Real world inspiration such as this can be a very powerful 'convincer' when putting together a board for a client.
02. Take pictures when you're out

Use your smartphone to snap anything that catches your eye
Real world inspiration is all around us. So use the camera on your phone to take pictures of everything you see that inspires you, whether that be a bird in flight, a great use of typography on a sign, or the brickwork on a building.
They don't have to be great photos in the traditional sense – it's all about capturing thoughts, impressions, themes and feelings.
03. Curate what you include
Have you ever had the misfortune of going to a gallery exhibition and it just not doing anything for you? You weren't 'touched' by the exhibition or 'moved' by what was on show – and other similar emotive profusions. It's very easy to shove a load of stuff together and call it an exhibition; it's an absolute talent to curate threads and synergies between works and call it an exhibition.
When putting together mood boards, think of yourself as a curator rather than a collector, and try to introduce meaning and threads from one image to the next. It makes for easier interpretation.
04. Choose the right format

If you're presenting your mood board in person, you need to take a different approach
From the outset, establish whether your mood board is going to be presented in person or emailed to the client, as this will determine whether you produce an offline or online mood board. The distinction is not trivial; the two formats demand very different approaches.
An offline mood board will generally be looser in style and require the extra kick and emotive spark that comes from it being presented to a client. An online mood board should be tighter and will generally need to work harder to convey a theme or style.
05. Build things up around a large image
Whether your mood board is electronic or physical, the layout needs to give prominence to key theme images. You can then surround these with smaller supporting images that enhance the theme.
It's a subliminal trick. When someone sees a large image on your board in their heads they'll have questions about it – which they'll quickly scan the rest of the board to find answers for. If you place smaller supporting images around the larger image they should answer these questions by clarifying the messaging given in the larger one.
06. Get tactile

Don't be afraid to get a little crafty
When making a physical mood board, don't be afraid to get, well, physical. Traditionally, mood boards are made from foam board. Although cutting this stuff up with a scalpel and spray mounting cut-out images onto it can be a pain (especially if you're not dexterous with a blade), it's extremely effective as a presentation tool. The tactile nature of cut-out images glued onto boards enhances the emotiveness of what's being explained.
It may seem like a ridiculously old-fashioned thing to do, but perception-wise it's a real ace up your sleeve as a designer. Just be careful with your fingers on that blade...
07. Incorporate it into your pitch
Generally mood boards are considered to be separate to pitch or presentation work: they stand alone to show mood and tone. This is standard practice, but consider instead making them part of your pitch or presentation. Remember, you're trying to use subliminal visual tricks to make a client 'get it'.
Mixing mood board elements in with the presentation – rather than bolting them on at the end – can be an effective way of communicating your concept to the client.
08. Don't reveal it too early
It's important to make sure that a well-meaning project manager doesn't email an offline mood board ahead of the presentation 'so the client knows what we're presenting'.
For an offline mood board it's far better to let it all sink in to the client's mind as you showcase it, rather than come armed with lots of questions before you even start.
09. Present your mood board yourself
In a similar vein, if your mood board is being presented to the client, try to be involved yourself. It makes no sense to have something that originated in your head being communicated by someone else, because that way meaning can become muddled in a Chinese whispers-type mess.
10. Keep things loose
Locking an idea or a style down in a mood board can be detrimental, as the client will feel shoehorned into going with a particular aesthetic. Keep everything a little loose and don't make everything look too final.
If you're using preview images from image libraries, don't worry about the watermarking on them – it all adds up to a 'hey look, we can change this, these are ideas' feel to the board.
11. Watch the audience's faces

Pay attention to your audience's reactions
When you're presenting an offline mood board, watch the faces of those you're showing it to. Ignore any verbal client 'oohs and ahhs' but instead watch their facial and emotive reactions as they look around the board. This will give you a much more honest take on whether the board is doing its job and if they're reacting well or badly to what you're showing them.
You have to put these people 'in your mood', so ignore their mutterings and watch their emotive reactions.
12. Hone your mood board skills

Employees at Landor use mood boards to express themselves to other members of the team
Employees at branding agency Landor Associates use a form of mood board to showcase themselves to other members of the team. Individuals put together nine images in a 3 x 3 grid to give their work colleagues an insight into what they're like; their interests, passions, cares and worries.
If you ever want to test out your mood boarding skills, try this out and showcase it to your colleagues.
13. Text it up
Don't ignore the power of a few isolated words on a board. Well-chosen words can be fantastic show-stoppers and give your viewer pause for thought as they have to mentally read what's in front of them. Big, bold words juxtaposed together work very well at creating drama, tone and meaning for any project.
14. Make the theme obvious

This mood board for UNICEF next to the finished thing shows a clear theme
Obscure references can be fun, but try to have a number of relatable items or 'touchpoints' in your mood board. You want to let others in, so being deliberately obtuse will earn you no points at all. It's easy to fill out a board with a pile of incomprehensible references; it's much harder to be clear and use imagery to sell your vision. But it's worth the effort.
15. Aim to spark an emotional response
Think a little bit left of centre if you're presenting a mood board to a client. What would give them a genuine emotive response? Real world objects are good for this. If you were inspired by the beach, bring in a shell. If your eureka moment happened on the train, bring in the ticket. This type of thing intrigues people's brains and gains that all-important emotive reaction.
16. Don't make presumptions
Expecting too much of the audience can be the difference between a successful mood board and one that's dismissed as being too cerebral. There's a danger of assuming they'll 'know what you mean' – chances are they won't. So if it takes a few more references, images or textures to get what's inside your head into a client's then add them in.
17. Test your mood board
Don't forget to test out your boards before you send them off. It's not a game of Pictionary, so if your testing audience have to ask too many times what an image means or why it's there, then it probably shouldn't be there.
18. Have fun
The whole process of creating mood boards should be fun – a refreshing break from the often tedious tasks of the jobbing designer. If you're not having fun then it's a sure sign you're going about things the wrong way...
19. Use mood boards to brief designers

A mood board for Tom Baker's work on The Avengers cartoon series
Following on from the previous point, mood boards are a good way to brief a creative. Don't be afraid to go into detail. The mood board above was compiled for animator Tom Baker as a mood and style guide for creating cartoon versions of The Avengers TV series characters. Instead of relying on one example of a character, several types were found in many different poses, which gave Baker a clear take on the style and direction of the piece.
The finished characters for the Avengers animated series
20. Use mood boards to speed up client signoff
Mood boards shouldn't just be for pitches. Consider preparing mood boards to show other similarly themed projects, websites or functions before creating polished visuals.
'I'll know it when I see it' is a phrase that most of us are familiar with. But to hear this when finished artwork comes back from a client is gutting, signifying that it's back to square one. Using mood boards at different stages of the process can help you avoid this happening.
Related articles:
-
Vertex is offering an incredible opportunity for its Access All Areas ticket holders: one of the most respected people in VFX over the last three decades, Scott Ross, will be sharing his wisdom at the event in London on 13 March 2018. Ross will use his vast experience to talk about the dangers and opportunities facing the industry.
Ross managed ILM for George Lucas before leaving to form Digital Domain, with James Cameron and Stan Winston. Digital Domain won two Academy Awards as well as a further nomination. The visual effects of Titanic and What Dreams May Come stand up well to this very day, a testament to the skills and artistry of the Digital Domain teams.
In recent times Ross has been touring the world, speaking to VFX community gatherings, drawing from his personal experiences to talk about the future – and it's this area that he will be discussing at Vertex.
The UK has a thriving visual effects community, with an established history that has, in recent times, been boosted by some of the biggest projects in movie history – from Harry Potter to Guardians Of The Galaxy and so many more.
Times are changing and while some are worried, there are also huge possibilities and new opportunities that are opening to a post-Brexit VFX community. Ross will discuss engaging with new audiences, working alongside new partners and sharing in developments of cultural relationships – things that can only be of benefit to us all.
As well as being a world-class VFX sup, he is an accomplished businessman and will talk about what he sees as the future of the community, from small studios and individual artists, right through to the international studios.
The chances to hear a talk of this level are few and far between and you'll even have an opportunity to ask Ross questions directly, so book your tickets soon to avoid disappointment. Don't miss out on the chance of asking an Oscar winner a question about your career or passion.
Head to www.vertexconf.com to book tickets and find out more about our other amazing speakers, workshops, recruitment fair, networking event and much more.
Related articles:
-
Apple said on Wednesday that it will rush an emergency patch to users that fixes an embarrassing login bug in its High Sierra operating system.
-
Autodesk Maya is one of the go-to packages for serious 3D artists, with its advanced tools and high-end plugins, this software is capable of creating some incredibly impressive 3D art to add to your design portfolio.
The Maya tutorials on this page will help to demystify its core features and improve your skills. So whether you're a beginner or seasoned pro with the software, there's a Maya tutorial here for everyone to get their teeth into.
Give them a go and show us what you've created on Facebook or Twitter.
01. Mastering Maya's interface
If you're just getting started with Maya, it's definitely worth taking a look at this interface tour video from its maker Autodesk. This will give you a basic overview of the layout and show you where to find the most used and useful tools for beginners.
02. Beginner's guide to Maya

Pluralsight has extensive library of in-depth Maya tutorials
If you're wanting to learn Maya (or any other creative software for that matter, Pluralsight is a brilliant place to start. It has a huge library of Maya tutorials depending on your project type and skill level. When you sign up to Pluralight with a demo account you can watch select lessons and courses for free, including this beginner's guide to Maya. The helpful video tutorial explains the essential workflows, terms and techniques to help you get started with Maya.
03. Maya for Beginners
If you want to get to grips with Maya without any sign up, this free Maya tutorial video by Shane Whittington will teach you all the basics, starting with the tools and user interface. Over two hours you'll learn how to create and texture polygon models, how to light your scene and finally create a rendered image of your work.
04. Exploring Maya 2018

Learn all about the 3D modeling tools and workflows in Maya in this brilliant video tutorial series
For those of you lucky enough to have your hands on the latest iteration of Maya, you can find an absolutely brilliant series of instructional videos over on the Autodesk website. Here you'll find everything from building models and animation to creating UVs and working with lights.
05. Introduction to Animation

Create your very own alien environment from scratch in this free video Maya tutorial
In this free Maya tutorial you will learn how to create your own 3D scene from scratch. The 90-minute video includes how to sculpt environments, texturing, working with lights and cameras, animating, creating visual effects such as fire and electricity and rendering and exporting animated films.
06. Maya 2017: Easy rigging
Rigging a 3D model can be a complicated task, but the team at Faex Editing have tried to simplify things with this helpful Maya tutorial. Easy to follow, this guide will help you get a basic understanding of and set up the human bone structure in Maya 2017.
07. Create a walk cycle in Maya
Learn how to create a convincing walk cycle with this detailed 40-minute Maya tutorial. Master each pose, set up the timing and refine the walk cycle using the graph editor.
08. UV Mapping
Master the art of placing 2D textures on to 3D models in Maya using the UV editor tools with this 30-minute guide.
09. Maya shaders and textures

Wrap your head around all of Maya's different material types with this detailed guide
As part of a Know the Basics series by Paul Hatton, this guide delves in to the process of creating and assigning materials in Maya. Wrap your head around all the different material types and how to render them in Maya's default renderer, Arnold.
10. Maya 2018: Bifrost fluids

Get to grips with simulating fluids with this in-depth Maya tutorial
For the more advanced Maya user, this brilliant Maya tutorial from Lynda shows provides an overview of simulating fluids in Bifrost. Topics include emitting from and colliding with a polygon mesh, adding velocity, friction and drag with motion fields and optimising space and accuracy. You will need a Lynda account to access the course, you can sign up here or opt for a free 30-day trial.
11. How to design an animated hero
Learn how Scott Raymond animated Bink to be as appealing as possible
Scott Raymond shares his process for animating Bink, a curious little seafaring creature, for Eric Miller Animation Studios' web series. His challenge was to make the most appealing introduction to the character as possible, in just a short amount of time, incorporating Eric Miller's vision and existing setups, while trying to define Bink's unique personality. A versatile rig made it possible to really push the character poses and find the most appealing version of him.
12. Create a realistic environment in Maya
Eva Ng explains why getting your references right is key to nailing environments
Creating different environments is exciting, but to make them believable it's key to study your references. In this Maya tutorial, Eva Ng demonstrates how she made this project based on Vivienne Gucwa's photo Summer on Perry Street, NYC. It's also an opportunity to explore new production workflows and to improve your future projects.
Related articles:
-
With so much inspiration for artists around every corner, it's a shame to shut yourself away indoors. But for all the benefits and exciting possibilities you get with painting outside, there's a big downside – having to carry all of your equipment.
The answer is to travel light and when it comes to brushes, choosing a pocket-sized version that will work with various painting techniques, can really make things easier. Making something smaller can sometimes mean sacrificing quality, though, so we were interested to see whether Rosemary & Co, a company with an excellent reputation in the quality of the brushes it produces, fell into this trap with its range of pocket brushes.
Brushes in action

These thirsty brushes can cover larger areas
We tested the squirrel mop, the kolinsky sable pointed round and the kolinsky sable one-stroke flat. The brushes have a hollow aluminium handle, while the base of the ferrule has a smooth collar that fits into the handle during use. When you’re done, you pull out the brush, reverse it, and it self-encloses back into the handle, making a secure carrying case. It’s great to know you can toss your best sable brushes into a bag or pocket without damaging the tip. That said, you do have to be careful when inserting the brush. We found it best to wet them to a point to avoid bending back hairs.

Tapered strokes with the pointed round

Feathering with splayed hairs
We tested the brushes on a number of outings. When painting in a moderate 9x12in size or smaller, the largest pointed round – what it calls the R3/#10 – is perfect. It’s a decent size, but slightly smaller than a #10 in conventional wood-handle brands.
In addition to the round, the mop is useful for large areas. But truthfully, you can create a very nice painting just with the round.

Bolder strokes with mop

Detailing with the point
In our tests, we found the sable thirsty enough to paint a sky (working fast and pulling the bead), yet sharp enough to tackle tree branches or lamp poles and fire escapes. It’s really a great all-round brush! Certainly comparable to other brands.
Rosemary & Co also offers some speciality brushes, including a One Stroke (long-hair flat), a Filbert, a Dagger (in a sable/synthetic blend), and a Comber, which is a flat with staggered short hairs giving it the look of a comb or rake. We didn’t spend much time with these, but if they’re to your taste, you’re in luck.
Last thoughts

Painting some smaller details
One thing we would have liked to see is some engraving on the handle, as they all look the same when closed. This can be solved with a tape and marker, though. Also the handle wasn't as snug as we would have liked – a reassuring click when they connected would have been nice– but we didn’t drop one so it's not a problem. Also, we hope two or three larger sizes are added to the range.
But these quibbles aside, the Rosemary & Co pocket sables are great brushes for any travel-sketching watercolourist.
This article originally appeared in issue 11 of Paint & Draw magazine.
Related articles:
-
At the AOI, we advise on pricing on a daily basis, covering everything from the smallest private commission to the biggest advertising campaign. We see illustrators being offered fair – and often generous – amounts of money every day. Yet we also see many who willingly give away their rights or work for free, and then are not able to sustain a career in the industry.
But with some support and a bit of basic knowledge, illustrators are increasingly negotiating better fees. We say a big yes to that.
We asked fashion illustrator and AOI member Willa Gebbie to share her insight on costing. More information about pricing can be found in the Members Area at The AOI.
01. Consider pricing based on usage

Gebbie co-runs the popular monthly illustration meetup Yo Illo
"Pricing is difficult. It's hard to know what the going rate is, and no one wants to feel like they've charged too little," says Gebbie.
"For jobs in marketing and advertising, I charge based on usage, which is a bit complex as you need to think about how the illustration(s) will be used, who will use it (or them) and for how long. I loved Jessica Hische's article, The Dark Art of Pricing, which gave me so much confidence in how to speak to art directors about money and usage. The AOI's pricing advice has also been invaluable."
02. Remember it's not just about the illustration
However, sometimes, quoting isn't a straightforward process. "Recently, a regular client was interested in developing a short animation with my illustrations," says Gebbie. "I've never worked on an animation before, but I share a studio with some really great animators, and knew it could be great to involve them and work together.
"When the role involves multiple people, you're not just being paid to draw, you have to manage the project for the client, and make sure that everyone involved is being paid fairly."
03. Don't sign over copyright

Gebbie's clients have included Chanel, H&M and Diesel
Occasionally, Gebbie's clients will ask her to assign copyright. "It's really disappointing," she explains. "I'll always give them a call and kindly ask them if they can provide a licensing contract. Sometimes that's all it takes; not everyone understands what they're actually asking for. If the money is decent, or if it's obvious that the artwork will never be used for anything else, then I'll settle with giving rights ‘in-perpetuity'. But often, I'll turn work down rather than give away my copyright – mainly out of principle."
04. Never work for free
So how does Gebbie feel about working for free? "No way. Not for a company who is profiting from it," she assets. " There are much better ways of working for free, such as collaborating with other artists on personal projects, so I do that instead. I already donate a lot of my free time to the community through Yo Illo. Sometimes I'll do a freebie for a friend's wedding invitation, but only for VERY good friends."
This article originally appeared in Computer Arts issue 271; buy it here!
Related articles:
-
Knowing how to code is an invaluable skill. Whether you're looking to launch a career as a web developer or just want to add a new ability to your resume that may put you in line for new opportunities, you can pick up the skills you need to take part in the new wave of development with the help of the Learn to Code 2018 Bundle, on sale now for a price you choose!
The Learn to Code 2018 Bundle is packed with courses for people of all skill levels. It's designed to give you the know-how you need to be a talented developer with the talent to succeed, no matter where you're starting from. You'll find hundreds of hours of actionable content in these 10 professionally-caught courses on the most important programming languages, from Python and Swift to Java and R Programming. Add new skills to your resume so you can create great works online for fun or get a promotion and take home more money on your paycheck.
The Learn to Code 2018 Bundle usually retails for $1,479. Right now, you can pick the price you pay for it. Beat the average to unlock it all or get on the leaderboard. The price is up to you but you can't go wrong no matter what you pay, so grab it today!
Creative Bloq deals
This great deal comes courtesy of the Creative Bloq Deals store – a creative marketplace that's dedicated to ensuring you save money on the items that improve your design life.
We all like a special offer or two, particularly with creative tools and design assets often being eye-wateringly expensive. That's why the Creative Bloq Deals store is committed to bringing you useful deals, freebies and giveaways on design assets (logos, templates, icons, fonts, vectors and more), tutorials, e-learning, inspirational items, hardware and more.
Every day of the working week we feature a new offer, freebie or contest – if you miss one, you can easily find past deals posts on the Deals Staff author page or Offer tag page. Plus, you can get in touch with any feedback at: deals@creativebloq.com
-
For a long time companies forgot to think about the needs of their users. Companies only focused on their priorities and what they wanted to express. That changed with user-centred design – people started digging into the needs of different audiences. But there’s a risk that an organisation can lose itself in exclusively paying attention to users. Brand and content strategist, Margot Bloomstein, is on a mission to bring the pendulum back to the middle.
“If companies within a particular industry that speak to the same audience only focus on the needs of that audience, it would be a very bland experience ,” she argues.
“Airlines that sell the same product would all look and sound the same, and that’s just not right because we know that they differ as brands, even if they fly the same routes, sometimes at the same price point. We know that the experiences that JetBlue, Virgin and United offer differ wildly, and people have different loyalties, proclivities and interests that correspond to those brands. I like to work with my clients to help them best express those differences. If they know who they are, then they can better decide what they want to communicate and what kind of language, content types and platforms are best to engage their audiences.”
Bloomstein, who has worked with clients like Timberland, Lindt, and Al Jazeera America, helps brands ensure the choices they make are not just right for their audience but also right for them as a company; an approach she calls brand-appropriate user experience.
Should a brand be communicating in short, truncated sentences, long-form copy or in bullet lists, for example? Should they be conducting video interviews with their stakeholders, or would it be better to hear directly from their biggest customers?
The first step, regardless of the client’s industry, size or problem they are trying to solve, is always to help them create a message architecture. Bloomstein defines this as a hierarchy of the communication goals that can be used to guide the copy creation as well as the visual design. For this purpose she tends to facilitate an exercise around BrandSort, a deck of cards that she’s created to help the client prioritise and clarify all of those important communication goals.
Bloomstein guides the client through a three-step process (first introduced in her book, Content Strategy at Work) of sorting attribute cards describing who they are, who they’d like to be and who they’re not. She then analyses which terms are so core and important to the brand that they want to make sure they hold onto them, while others are discarded.
“Maybe you’ve always been thought of as traditional and you realise that’s stodgy and boring, but you still want to be seen as established, responsible and reliable, ” she explains. “Finally, we figure out the natural patterns in those terms and rank them. We find out what’s most important to communicate – for example, your sense of innovation and being a ground-breaking, thought leadership-orientated organisation."

Margot created a pack of cards to help clients prioritise and clarify communication goals
Once the message architecture has been established, Bloomstein moves into the more tactical work. This could be conducting a content audit and establishing editorial style guidelines. The message architecture is used to measure the brand’s existing content to test it.
“I can’t tell you how many times I’ve worked with a team that might start out by saying they want to be seen as modern,” Bloomstein laughs, “but when I ask them what that means and how it differs from how they’ve always done things, oftentimes people pause and shrug, because who doesn’t want to think of their work as modern? We have to unpack those terms and go from abstract to concrete.
"The BrandSort tool is a way to do that. By the time you get to the actual content, whether it’s speccing out photography, developing infographics or writing copy, it’s real and concrete, and you can see how it all goes back to the original message architecture. I firmly believe that you cannot conduct a content audit that is effectively qualitative as well as quantitative unless you first understand the message architecture of an organisation.”
To find out more about Margot's career, and examples of brands that get content strategy just right, you can read the full interview in the latest issue of net magazine.
Margot will be one of the speakers at Generate New York on April 25-27, 2018. You can view the full, star-studded line-up, and book your early bird tickets now.
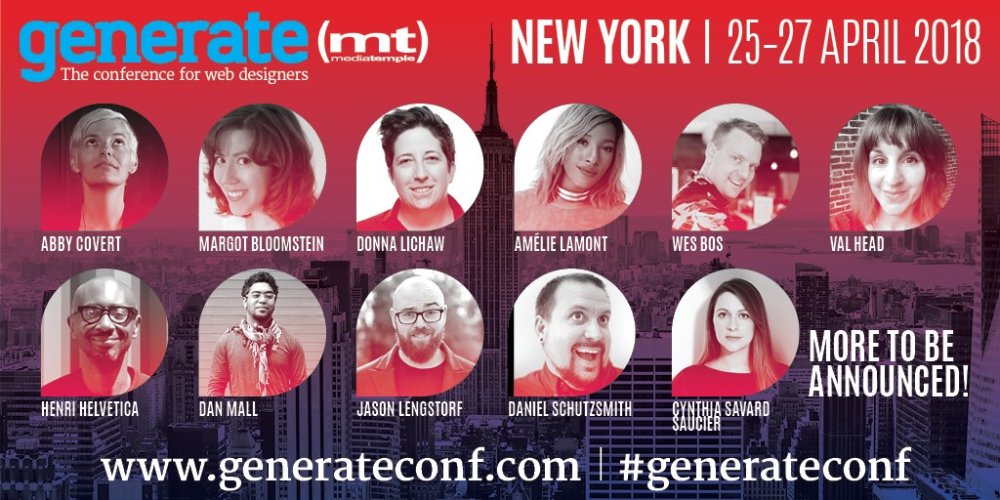
Tickets for Generate New York 2018 are out now!
Related articles:
-
Adobe has released a video that shows off an intelligent new selection tool coming to Photoshop CC soon, called Select Subject. This tool uses Adobe Sensei – the artificial intelligence and machine learning platform that headlined the tech reveals at Adobe Max last month – to work out where the main subject is in an image.
It promises to make basic and time consuming tasks such as performing cutouts and making photo edits with masks quicker and more straightforward than ever before.
Whereas you were previously forced to use the lasso, quick select or pen tools if you wanted to select an individual subject, Select Subject does all that work with one click, making working in Photoshop CC much easier.
It sounds too good to be true, but watch the Select Subject tool in action with the video below and prepare to be amazed.
Picked up your jaw from the floor yet? What's so amazing about this machine learning tool is that it can work with single objects or group shots, plus it's clever enough to filter out any foreground details that could potentially clutter the subject.
As well as being powerful, this tool is flexible too, allowing users to refine the mask edge to their heart's content – keen-eyed readers will notice that the image in our header could do with a little refinement, as the model's lost part of her left arm.
All the plebs are gonna just denounce people that make this our job
YouTube user Starius2Every innovation comes at a price, though, and lo and behold the comments on the Select Subject tool's sneak peek video are filled with creatives anxiously wringing their hands that this feature could lower the bar for entry when it comes to graphic design.
We know that the YouTube comment section is usually best thought of as a no-go zone, but just this once we decided to take a look at what designers are saying about this impressive tool.
Most were quick to sing its praises, with one user claiming that "Adobe has commercialised actual magic", while another was slightly more cautious with their admirations: "PLEASE STOP MAKING PHOTOSHOP EASIER! PLEASE. All the plebs are gonna just denounce people that make this our job."
With no release date set in stone (the video teases that the Select Subject tool "is coming to an update to Photoshop CC") it remains to be seen if the tool leads to amateur designers running amok.
Related articles:
-
The new issue of 3D World magazine is out now, and it's as packed as ever with expert 3D tutorials, VFX secrets from the titles you love, and industry insights and inspiration.
Secrets from the production of smash-hit movie Blade Runner 2049, and a celebration of Firefly as the show turns 15, kick off our features this month. Plus, we bring you tutorials on creating video game characters in ZBrush, sculpting VR environments in Oculus Medium and Quill, and working with Unreal Engine 4 and IvyGen.
Buy 3D World issue 229 here
Look out for the January 2018 issue in stores now, or order a copy online here. Read on to see what's inside this month's magazine.
- Never miss an issue: Subscribe to 3D World magazine here
Feature: Blade Runner 2049

In this feature we explore the visual effects of Blade Runner 2049, with some fascinating render breakdowns and behind the scenes shots.
Learn how the giant Joi hologram was built, how future Las Vegas was created and how the infamous digital threesome scene was constructed.
Feature: Firefly at 15!

It's now 15 years since Joss Whedon's cult sci-fi show Firefly was aired but the visual effects still hold up well to this day, something common to the work of Zoic.
In this feature we get to talk about many aspects of the show's creation, including a look at some incredible elements that never made it to screen, before Fox cancelled it.
Not only that but we have an exclusive shot breakdown of the iconic 'Train Job' sequence with one of the original artists.
Tutorial: Game characters

If you have ever wanted to create stunning game characters then this is the issue for you. Our awesome cover artist reveals his techniques for sculpting and texturing realtime characters, so you can jump start your own projects.
Tutorial: Build environments in VR

It's rare that we get to create assets in the some workspace as their final use, but with the rate of technological advancement that is becoming more and more possible.
This issue we show you how to dive into VR to create environments that will be used in VR. This is both a logical and exciting method of working.
Tutorial: Unreal 4 terrains

In this tutorial you will learn some advanced techniques for building terrains for use in Unreal Engine 4. This is a fantastic step-by-step workshop that will give you invaluable insights into environment creation, which is applicable to any of your projects.
Tutorial: Bootcamp

This issue's instalment of bootcamp introduces you to an incredibly useful plugin, which is also free!
Use it to grow splines that spawn polygons over any structure. The obvious use is ivy but you can swap out textures to change things from leaves to crystals or whatever you can imagine.
3D World is the world's best-selling magazine for CG artists – packed with expert tutorials, inspiration and reviews. Buy issue 229 here or subscribe to 3D World here.
-
When it comes to developing your illustration skills, your first stop of course should be this very site. Within our illustration, art and digital art sections, you’ll find a range of features, tutorials and software reviews to help develop your abilities.
But if you’re looking for something specific, you may need to look elsewhere. So here we’ve compiled our favourite free sources of illustration training on the web.
Note, though, that not everything on these sites will necessarily be free. So where the site offers a mixture of free and paid resources, we’ve included a relevant link to get to the former quickly.
01. Adobe.com

These free Illustrator tutorials come straight from Adobe, including this introduction to Start making artwork
Adobe Illustrator is one of the most popular tools for creating illustration, so you’d figure the company would give something back. And it indeed has, in this great collection of tutorials, divided into beginner and experienced levels, all given by Adobe experts. A mixture of text and video, with sample files, these tutorials get to the heart of how to use tools within the software that you may not even be aware of.
02. Affinity Designer Video Channel
Affinity Designer is fast being adopted by many illustrators looking for a professional alternative to Illustrator. Because its interface is quite similar to Adobe’s, it’s relatively easy to pick up and run with, but there are differences. So the team behind it has produced a range of video tutorials, on Vimeo and on YouTube, to get you up to speed.
03. Painterartist.com

Corel has a range of free tutorials to help you use its software, including this guide on How to draw manga
Whether you’re an experienced user of Corel Painter or an absolute beginner, Corel’s own site is the place to head for informative and in-depth tutorials. From how to replicate the techniques of the Old Masters to getting on board with the latest Manga styles, there’s a huge amount of training available here, and you can even download a trial copy of the software to try it out first.
04. Envato Tuts+

Evato Tuts+ offers a mix of free and paid-for lessons, including this tutorial on How to create a surreal scene by Lewis Moorhead
Evato Tuts+ is a long-established provider of free instruction to help you develop your creative skills. There are tons of tutorials and courses to choose from in the design and illustration section, which are aimed at both beginners and advanced level users, and cover a range of drawing software.
While the tutorials are generally free, the courses normally require a subscription. That said, most of them contain free sample lessons, so you can at least get a feel for them first.
05. Creative Live

Classes on Creative Live are free when broadcast live, paid-for later. This class by Mary Jane Begin examines the fundamentals of colour
CreativeLive is an online education platform that broadcasts live classes to an international audience. It operates on a freemium pricing model, which means that all classes are free to stream while they’re live and can be purchased to watch at a later date. Tutorials in the illustration category are grouped under the topic headings Drawing, Digital Illustration and Adobe Illustrator.
06. PPLLUV Process

Watch professional illustrators such as Sean Ferguson at work with PPLLUV Process
One of the best ways to learn is by watching the pros at work, and that’s exactly what PPLLUV Process sets out to bring you. Calling itself the 'Home of Open-Source Creativity', the site strives to demystify creativity by showing professionals using their skills to solve creative problems. It’s a paid-for service but there are currently two packages in the Free Processes section to tempt you in, including video walkthrough and source files.
07. Skillshare

Skillshare is generally paid-for but includes a number of free taster courses, including Character design by Sarita Kolhatkar
Skillshare is an online platform where anyone who wants to teach can create classes. Most of these are paid for, but there are a number of free courses to tempt people in. You can find those related to illustration simply by clicking the link above, including Vector illustration: Design a playful character using geometric shapes and Adobe Illustrator: Make paths fast & easy.
If you're ready to upgrade to the paid-for classes, Creative Bloq readers can get two months of Skillshare Premium courses for free right now.
08. Spoongraphics

Spoongraphics has been posting free illustration tutorials for more than a decade, including this one on How to create a vector popsicle in Adobe Illustrator
Established in 2006, Chris Spooner features design tutorials, free resources and tons of visual inspiration. Its tutorial section is filled with cool vector projects, such as How to create colourful gradient orbs and How to create digital particle waves.
09. Digital Arts Online

Digital Arts Online features some top-class illustration tutorials, including How to draw a mandala by Breno Bitencourt
Digital Arts is a UK-based online magazine focused on the creative industries, from graphic design to filmmaking. Its tutorials section is packed with illustration projects, usually based around Photoshop or Illustrator, such as How to draw a mandala in Adobe Illustrator and How to create artwork with a 1980s feel in Photoshop.
10. Cartoon Smart
Cartoon Smart is a huge online training site teaching skills in the areas of game art, illustration, animation and app development. There’s a huge amount of paid-for instruction on the main site and you can get a taster by checking out the free lessons on the Vimeo channel, including How to draw an angry muscular guy’s head in Procreate (above).
11. Vector Guru

Vector Guru offers simple, no-nonsense illustration walkthroughs, such as this one on How to create a twisted vector ribbon
Vector Guru is a simple, no-nonsense website featuring, at time of writing, a total of 29 vector illustration projects. Based on step-by-step, text and images approach, these include How to create a custom vector shadow and How to create a polygon background from a photo.
12. Vector Cove

Vector Cove boasts a range of Adobe Illustrator tutorials with topics including How to create texture in Adobe Illustrator
Vector Cove houses a large collection of Adobe Illustrator tutorials for a variety of skill levels. Based on a step-by-step, text and images approach, typical subjects include How to create a haunted castle for Halloween, How to create cardboard boxes and How to draw a taco.
13. Creative Nerds Illustrator tutorials

Creative Nerds’ Illustrator tutorials are based around either software features or specific drawing projects, such as How to create a USB flash drive using Illustrator
Established in 2008, Creative Nerds is a design blog that offers free resources and tutorials on a range of creative topics. The section linked to above features both tutorial list features and individual tutorials. The latter are both text and video-based, and cover everything from How to create an angry little Samurai to How to export multiple SVG graphics quickly.
14. Vectips tutorials

Vectips features short, step-by-step tutorials walking you through projects such as How to create realistic vector leaves in Illustrator
Owned and maintained by Kevin Sanderson, Vectips is a site dedicated to Adobe Illustrator tips, tricks, and tutorials. Recent tutorials include the likes of Create a cartoon skull vector and Create a haunted house background.
Liked this? Read these:
-
You're reading Image Optimization Tools & Tips for Webmasters, originally posted on Designmodo. If you've enjoyed this post, be sure to follow on Twitter, Facebook, Google+!

Proper image optimization is crucial for a fast website. Whenever you run your site through a tool like PageSpeed Insights you’ll always find helpful hints to improve your images. Typically this involves compression where the image says the same size and general quality, but you compress some parts to make it a smaller file. You can do this […]
-
A major bug in Apple’s macOS High Sierra gives anyone with physical access to a system running the latest version of the OS root access simply by putting "root" in the user name field.
-
Google discovered a spyware app that uses nearly a dozen old vulnerabilities to root devices and steal sensitive data from social media applications.
-
The world's premier racing championship, Formula 1, unveiled its first rebrand for 23 years at the close of the Etihad Abu Dhabi Grand Prix on Sunday. The new identity (shown below) was created by a team at Wieden + Kennedy London led by Richard Turley.
Featuring a sleek red logo and three typefaces, the rebrand replaces the familiar Carter Wong studio negative space logo (above) which Formula 1 has been using since 1994.
Formula 1's director of marketing, Ellie Norman, says that the refresh “speaks to the core of why people loved the sport in the first place."
Eagle-eyed fans were aware that a change was on the way when trademarks were applied for new Formula 1 logos earlier in the month. Out of these three candidates, the streamlined logo was chosen. See it below by clicking left to right through our gallery.
Whereas the previous logo focused on a clever use of negative space to showcase the Formula 1 name, the new design echoes the long, flat shape of an F1 car. By keeping the design close to the ground, this helps to communicate a sense of speed. This is a subtler representation compared to the old logo, which used dynamic red spikes to get the racing angle across.
Turley reveals the thought process behind the logo: "creatively, the challenge was to reposition Formula 1 as a forward-facing entertainment brand, which works across a multitude of channels."
Norman talked to fans of the sport to find out what the rebrand needed to focus on. "It was about racing," she explains. "But many felt those days were behind us and that the sport has become almost impenetrable for fans, particularly new ones.
“It was clear we were going to need to address some fundamentals of our brand, if we were to realise our ambition to make Formula 1 a major entertainment player and claim our rights to be the global media brand we should be. What we say and do now is so important for our future, but it must always be driven by our fans. They come first.”
Accompanying the new logo is a trio of typefaces by French designer Marc Rouault, which you can explore in our gallery below.
Rouault hopes that the sleek and curved look of the typefaces evoke the retro aspect of the motorsport in a similar fashion to the new logo.
To give designers an insight into how the logo developed, the team behind it has shared pages from an internal booklet that collect together dozens of potential variants.
It's interesting to see the various ways in which the design team reimagined the Carter Wong F1 icon, a design which set an intimidating benchmark for all involved.
When it comes to new logos there are always detractors who cling on to the previous iteration. But for a property as huge as Formula 1, the amount of attention has been immense. Fans seem to be split on what to make of it, and racing drivers themselves have also weighed in on the debate.
Lewis Hamilton said: "The old one was iconic, and the new one isn't." Meanwhile former World Champion Sebastian Vettel was more blunt with his observation: "I liked the old one better."
Rebrands always take time to settle, though, and perhaps once we see it in action properly more people will be won over by the new logo. In fact you can get a taste of what to expect right now by watching it in this teaser promo for the next season.
Related articles:
-
With the introduction of Sketch Cloud, a rethought file format and subscription-based pricing model, Sketch has had an exciting run. Besides a string of small but highly intuitive improvements, Sketch Plugins now update automatically, and outdated ones are disabled.
Sketch plugin management is heaps better, and the library is getting bigger every day.
So let’s take a look at 10 of the best Sketch Plugins that are drastically changing the way that we design user interfaces. Once you've spotted one you'd like, scroll down to the bottom of the article or click here to read how to install Sketch plugins.
01. Auto Layout
- Plugin Type: Added features
- Price: Free
- Summary: Responsive design for Sketch

Auto Layout is a responsive design solution for Sketch designers, turning static layouts into dynamic layouts
Group Resizing is a native feature that was added to Sketch late last year. It enables you to change the way that objects react when your artboards or parent groups are resized – it’s not exactly responsive design, but it’s close enough.
Auto Layout, built by AnimaApp, takes this functionality a little further. Where Group Resizing lets you create fluid elements and pin objects to a corner (think: :fixed positioning in CSS), Auto Layout also lets you offset elements by a certain amount of px, define minimum and maximum dimensions for elements (think: min-: and max-: in CSS) and do everything that Group Resizing allows you to do but with a much less confusing UI.
It also does something else, which we’ll discuss next.
02. LaunchPad
- Plugin Type: Website publishing
- Price: Premium plans from $9/m
- Summary: Convert designs to static HTML webpages
LaunchPad is an efficient way of converting .sketch designs into static HTML websites – domain and all
You’ve designed a website in Sketch. Great – now what? Design handoff? Nope, no need! LaunchPad offers an ultra-simple way to convert .sketch designs to static HTML webpages.
I’m always healthily sceptical about ‘easy’ ways to ‘convert’ design to code, but LaunchPad delivers. LaunchPad was built by AnimaApp, the makers of Auto Layout. In fact, you can combine LaunchPad with Auto Layout to export responsive .sketch designs as HTML. Let’s have a look.
First, the expectations. LaunchPad doesn’t export a ‘finished’ design. You’re still expected to fine-tune loading times, further tweak the code to ensure responsiveness and adaptability to alternative screen sizes, and overall optimise the code output to ensure that the site loads quickly and runs smoothly.
LaunchPad doesn’t make web design easy – nothing ever will – but it does give you some pretty solid foundations to work with. After trying it out with a couple of low-fidelity mockups, I can see that the code output is relatively simple, which means that:
1. We don’t have to worry about bloated code, and…
2. It won’t replace developers by a long shot
Features:
- Responsive design (if combined with Auto Layout)
- Videos, links and forms
- Font-family fallbacks
- Publishing and domain management
- SEO (title, meta description etc)
- Social media meta tags (Open Graph etc)
- Version control (easy to rollback to older versions)
- Google Analytics (or similar) integration
- Keyboard-centric workflow for faster designing
What LaunchPad can’t do:
- Export dynamic websites with JavaScript
03. Color Contrast Analyser
- Plugin Type: Added Features
- Price: Free
- Summary: Analyses Colour Contrast
Colour contrast between two elements, most often between backgrounds and body text, is compared using a formula defined by the WCAG (Web Content Accessibility Guidelines). Nobody likes to deal with formulas on a daily basis (or ever, really), which is why Color Contrast Analyser makes our top 10.
While many Sketch plugins help you accomplish little things easier and/or faster, Color Contrast Analyser also helps you to make solid design decisions using internationally recognised design standards.
Color Contrast Analyser compares two colours and defines the contrast ratio between them. Contrast ratios are split into three levels (A, AA and AAA), and the contrast ratio should always meet the minimum requirement of AA. Of course, you will never know the contrast ratio without a tool that measures it, so the Color Contrast Analyser Plugin is a must-have for designers trying to improve both the readability and accessibility of their work.
If only one layer is selected, the colour will automatically be compared against the background colour of the artboard.
While there’s no available keyboard shortcut, you can access the feature from the Plugins menu, or you can manually define your own keyboard shortcuts using this super neat trick in macOS.
04. ImageOptim
- Plugin Type: Added Features
- Price: Free
- Summary: Image optimisation in Sketch
ImageOptim brings a sophisticated image optimisation workflow into Sketch, a must-have for serious designers
While Sketch offers its own solution for optimising SVG files, compression for JPG and PNG image formats is still lacking the options to fine-tune using a range of compression techniques. Since ImageOptim has been offering a solid service for a number of years, it makes sense that it would bring this functionality to Sketch.
Any designer who cares about loading times and image optimisation (which should be all designers) certainly needs to add ImageOptim to their toolbox, although it should be noted that you still need the core ImageOptim app (free) installed on your macOS system, and you still need to mark layers as exportable in Sketch. Navigate to ‘Export and Optimise All Assets’ to begin.
05. Export More
- Plugin Type: Extended functionality
- Price: Free
- Summary: Animated GIF export
When you think animated GIFs, you think Dribbble shots and app demos. It’s no secret that GIFs are making a comeback, but the delicate art of making them isn’t exactly common knowledge. Do we use Photoshop for this? After Effects?
Both of those are terrific choices, but you don’t necessarily need a full-featured Adobe app to create cool GIFs, especially when creating relatively simple animations. Export More treats each artboard as an individual frame and combines them together. You can then choose whether to have the GIF play once or on a continuous loop.
Navigate to ‘Plugins > Export More > Artboards to GIF’, choose the desired playback method (default or loop), then choose the desired frame rate. It’s really, really easy – and fun.
06. Sketch IconFont
- Plugin Type: Time saver
- Price: Free
- Summary: Manage icon fonts in Sketch
Icon fonts are a highly efficient way of using virtually an unlimited amount of icons in your web designs without having to export and optimise a ton of image assets. Typically we reference icon fonts in the <head> section of HTML webpages, as we do with CSS and JavaScript. However, using them in Sketch is a little more complicated. Thankfully, Sketch IconFont makes it easy.
After downloading and installing Sketch IconFont, download SVG font files or download this font bundle, which includes the font files for FontAwesome, Material Design Icons, Ion Icons and Simple Line Icons. When you’re done, navigate to ‘Plugins > Icon Font > Install a Font-Bundle’ , select the downloaded fonts from the Open File dialog, then navigate to ‘Plugins > Icon Font > Grid Insert > [your desired icon font]’ in order to insert an icon.
Even if you’re intending to design a custom icon set for your design, having ready-made icons at your disposal can help you with rapid prototyping in the early stages of design, adding a little more clarity/fidelity to your low-fidelity mockups.
07. Craft
- Plugin Type: Prototyping
- Price: Free
- Summary: Design and prototyping tools
Craft is a super useful toolbox that supercharges your design and prototyping workflow. It’s made by the guys at InVision
Craft does a lot more than sync your .sketch designs with the InVision web app. In fact, most of Craft’s features can be used without having an InVision subscription at all. Craft supercharges your design workflow by letting you build your design with realistic data and images, rapidly tile objects horizontally and vertically, and create libraries of styles and assets that can be stored in the cloud, shared between your team and accessed at any time.
Recently added to this list of functionality is Craft Prototype, which not only lets you demonstrate user flows, transitions and dynamic components such as fixed headers/footers, but also sync those demonstrations into the core InVision app with Craft Sync, bringing your entire team into the loop with an abundance of top-class communication, collaboration and design handoff tools. With design, prototyping and handoff tools, Sketch + Craft + InVision is a triple-threat!
InVision App subscriptions start at $15 a month, which is suitable for small teams. However, Craft itself can be used for free.
08. Sketch Dynamic Button
- Plugin Type: Time saver
- Price: Free
- Summary: Dynamic widths for buttons
Buttons are very common in user interfaces – we use them to activate functionality, visually alert the user of important tap targets, and submit data to a web server. The problem is, not all buttons are made equal. Among other things, they often vary in size, depending on the character length of the text inside, which can make resizing each one in Sketch a bit of a hassle.
Sketch Dynamic Button isn’t a new Sketch Plugin, but it’s certainly one that can’t be stepped over. If you’ve never used it before, it allows the designer to specify a fixed amount of inside spacing (known as padding: in CSS).
When you change the value of the text layer inside the button, the button automatically resizes while keeping the padding intact. It’s very useful despite its simple nature.
09. Swap Styles
- Plugin Type: Time saver
- Price: Free
- Summary: Swap styles with another layer
Swap Styles uses a handy keyboard shortcut to swap styles with another later
With the help of a handy keyboard shortcut, Swap Styles quite literally swaps styles with another layer. Although simple by nature, Swap Styles is a huge time saver when designing hover states.
Let’s take a menu navigation, for example. A menu navigation would appear on every screen, although the active state (the visually highlighted link that describes where you are in the navigation) would differ from screen to screen. On the settings screen the ‘Settings’ menu item might be underlined, and on the newsfeed screen the ‘Newsfeed’ menu item might be underlined…
You usually have two options:
1. Awkwardly move things around for every artboard
2. Create an insane amount of shared styles and/or symbols
In this example, Swap Styles lets you move the active state style to another menu item simply using the keyboard shortcut: Cmd+Ctrl+S. Simple but powerful, right?
10. Sketch Runner
- Plugin Type: Productivity
- Price: Free
- Summary: Spotlight for Sketch
Sketch Runner is macOS’s Spotlight equivalent for Sketch – it quite literally does all of the running around for you!
Sketch is well-loved for its minimalist keyboard workflow. That being said, there’s always two or three keyboard shortcuts that you always seem to forget or confuse with another design app like Photoshop. And let’s not forget those less common tools and features that don’t have a keyboard shortcut and are hidden deep in the Sketch menu.
Sketch Runner solves these issues and does so in a way that macOS users are familiar with – Sketch Runner is the macOS Spotlight, but for Sketch.
Feature breakdown:
- Open Runner: Command+‘
- Run last action: Command+Shift+‘
- Jump anywhere: type ‘goto’ , then an object name
- Insert symbol: type ‘insert’ , then a shared style/symbol name
- Create symbols and shared styles: type ‘create’ , then a name
- Apply shared styles: type ‘apply’ , then a shared style name
- Install more plugins: type ‘install’ , then the extension name
How to Install Sketch Plugins
Sketch Plugins can be installed in a variety of ways. Most developers simply upload their extensions to GitHub in the form of a .sketchplugin file. This is easy enough, but you’d have to check back regularly for updates as extensions are known to break when newer versions of Sketch are released.
We can also use Sketch Toolbox to search for, install and manage Sketch Plugins. However, there’s no assurance that you’ll be given the latest versions, and some (such as Craft and Zeplin) aren’t even included in the toolbox.
SketchPacks is updated more often and usually includes the big boys like AnimaApp – yet it’s still missing the private-source plugins like Craft and Zeplin.
The newest version of Sketch (version 45) tries to update Sketch Plugins when it can, but using Sketchpacks or even the GitHub GUI – if you’re familiar with GitHub – could serve as a suitable alternative.
This article originally appeared in issue 297 of net, the magazine for professional web designers and developers – offering the latest new web trends, technologies and techniques. Buy issue 297 here or subscribe to net here.
Read more:
-
You're reading Opinions Mixed on Kickstarter Redesign, originally posted on Designmodo. If you've enjoyed this post, be sure to follow on Twitter, Facebook, Google+!

The crowdfunding platform Kickstarter has rolled out a surprise new logo complete with a redesign of their site. Out goes the old two-tone bubble font logo so familiar to us, in comes a pumped up, super bubbly dark blue logo. The old logo was simple, friendly & honest Founded in 2009, New York-based Kickstarter was […]
Adobe Teases New AI Powered Select Subject Tool in Photoshop
in Ειδήσεις από τον χώρο του Design και Hosting
Posted · Report reply
You're reading Adobe Teases New AI Powered Select Subject Tool in Photoshop, originally posted on Designmodo. If you've enjoyed this post, be sure to follow on Twitter, Facebook, Google+!
The holidays are coming. It’s the perfect time for an escape. Swiss Alps, Iceland or Melbourne are on my top priority list, but, because I’ll probably spend my vacation working, I’ll settle up with Photoshop’s new AI feature that promises to make photoshoping vacations way much easier. Select Subject by Sensei While there are quite […]
View the full article